The question of freedom is often looked upon through the lens of un-freedom, defining the term not in terms of the positive but that of the negative, of what its lack implies. But there is an alternative approach to the question, framing freedom as being given the space — the nothingness — to thrive, evolve and grow. To let some-one or some-thing free is to let it go, to create an emptiness around them that they can choose to fill howsoever they wish, taking away the guardrail of concrete that chafes and injures the very thing it claims to protect. Ironically, it is the desire to protect and do good that is the source of all un-freedom. It is weakness that props up the proponents of un-freedom, whether it be a cry of help to save oneself or save the children or save the wretched. Morality is the fount of un-freedom, inviting the sludge that ossifies the spaces around us, driven relentlessly by judgment that hearkens to the call, coming for one and all of us. Conversely, a moral vacuum is the friend of freedom. To suspend judgment, to invite evil into the world without allowing it to consume the world and convert it into its own image, to embrace the void — this is what it means to cherish freedom. At every critical juncture, we must make this very choice: do we wish to play the game of morality and judgment, or do we ally ourselves with freedom?
Each December, we look for a warm place to spend our time, ideally one that’s a stark contrast from the gray skies, damp air and brief days of the Pacific Northwest. This time around we decided to go to the city of Austin in Texas. Austin has decent cafes, restaurants and bars to hang out at, and plenty of parks and lakes to spend time around. On our last day, we hiked the River Place Canyon Trail.
One new construction stood out during one of our walks. This was a large 3084-square-foot house with a unique architecture.

But perhaps our most novel experience during this trip was taking Uber rides in Waymo vehicles (the autonomous and driverless ones).
Waymo’s autonomous and driverless car.
“NO is a complete sentence.” —Anonymous
It’s surprising how much trouble people have with just saying ‘no’. It may well have something to do with social norms, but while I’ve never had any compunctions on this point, it wasn’t until recently that I realized how hard it is for people to simply say ‘no’ (to anything).
Being able to say ‘no’ is a superpower. The simplest way to do it might be to say “No” or “No, I won’t do that”, and then offer a long pause, at which point the other person will likely ask you why. If you’re feeling charitable, you might then take a deep breath and offer some explanation of why you won’t (note: won’t, not can’t). You don’t always have to offer an explanation, and you must never be apologetic about it unless you truly feel that way inside. Regardless, you’ve already won, because you’ve done the one thing that’ll give you peace of mind that compounds over time: you’ve established and communicated your boundaries, and put truth and kindness ahead of appearing nice.
I am thrilled and excited to welcome Susie into our home!
Susie is a rich brown Bengal kitten, born on May 10th of this year. She quickly figured out what’s what, zoomed around to explore all the nooks and crannies (she’s quite a blur), and most importantly kept Hobbes at bay by hissing and snarling at him, even as he persisted in chasing after her (very cautiously) trying to make her feel welcome.
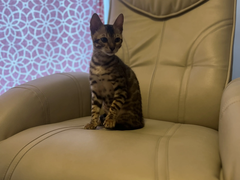
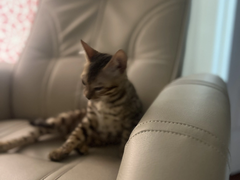

Susie is named after Calvin’s nemesis — but Hobbes knows they secretly like each other.
 Calvin and Hobbes: Valentine. BILL WATERSON.
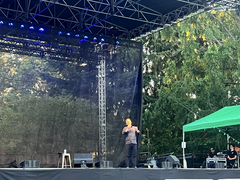
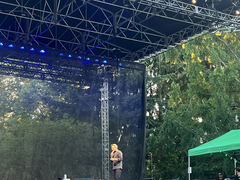
Woodland Park Zoo was a good place to be yesterday, with Seth Meyers performing his standup comedy show in an open-air setting. I like Seth Meyers — his comedy is light-hearted and fun, in this case focusing on his family and what it’s like to be a New Yorker, a husband, and a dad with three young kids.
Next time we do something like this, we should remember to carry our own chairs — it’s more comfortable than sitting on the grass.
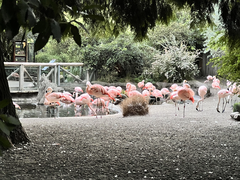
We saw a bunch of flamingos on the way out.
P. S. It’s pretty cool that Woodland Park Zoo has the “zoo.org” domain…